
In the mean time, check out the best Iceborne Sword and Shield so far!
| MHW Iceborne Expansion will be released on September 6th for Consoles! The Sword and Shield this time has a new combo. Do you know how to perform a Perfect combo for SnS?
|

MHW Sword and Shield is a weapon with many interesting mechanic. Despite the un-impressive look, the Sword and Shield is capable of almost anything. From stunning the monster to apply Elemental Damage. Here is my MHW Sword and Shield guide, featuring the latest SnS builds in 2019 as well as a progression for new players who decide to pick up this weapon.
This also introduces the “Lion Tyrant Build” – Provide not just the looks for monster hunter fashionist, but also the strength to withstand the most formidable monsters. You are not just a supporter, but also a powerful warrior tackles on the monster heads to heads.
MHW Sword & Shield Overview
So I chose Sword & Shield (SnS) as my main weapon for my first play-through, not just because it’s easy for new players, it also seems “a little boring” to my taste at first glance, I was afraid that in the long run, I couldn’t cover this weapon due to the flashiness of other. For more detail, you can check out my post for this weapon before the game release – Sword & Shield overview
Basic Attacks & Combo

- Three hits combo
![]()
![]()
![]()
![]()
![]()
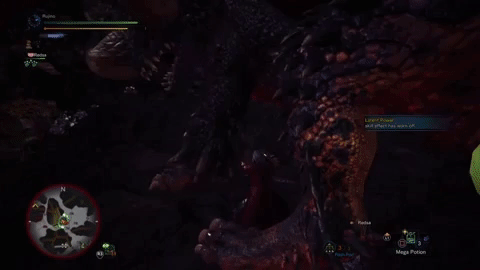
(There is a hit using the hilt of the sword which gives out KO damage) However, this basic attacks should not be your main focus. The reason? Long wind up time after the third attack and the animation took quite long to recover.
Total damage output is also not worth it. Personally, I never used the full combo
- Lateral Slash
![]()
![]()
![]()
![]()
![]()
Three quick horizontal slashes – heavy attacks of the Sword & Shield . This is your main bread and butter when on the ground (more to this later) This attacks does take quite long to recover (if you use it normally)
Recent updates increase the damage output of this attacks which is sweet!
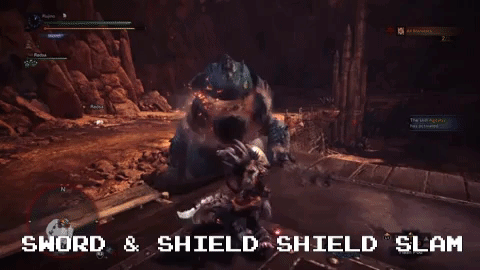
- Shield Bash Combo
![]()
![]()
![]()
![]()
![]()
![]()
![]()
Incorporate with directional input, The above combo will become the shield bash combo. Three hits using your shield. Most hunters naturally don’t use these attacks. The reason is it takes some time to get used to the “weird” attacks animation (to me at least) But this one will surprise you sometime.
It is capable of stunning monsters and is pretty good at them. Incorporate with Slugger skill and the classic shield slam combo, this will surprise your teams.
- Advancing Slash
![]()
![]()
![]()
By pressing both Triangle & Circle, the hunter will perform a lunge attack – This can be used as an opener or a mean to close the gap when needed.
Not just that though, I personally use this to dodge as well 🙂 This attack can be a great setup for the Charged Slash (below) when you initiating the hunt, and occasionally used to reposition yourself.
- Charged Slash – During attacks, you can hold down Circle and push back on the left analog stick, the hunter will hop back and follow up with a charge attack (If you release early, this will result in an Advancing Slash)
(During attacks)![]()
![]()
![]() (hold)
(hold)
New to Monster Hunter World is the ability to follow up this attack if it’s landed. If this charge attack connects, the hunter will jump up.
And in this stage, you can either press ![]() or
or![]() and follow up depending on the situation:
and follow up depending on the situation:
- Triangle – This will result in a downward slash counting as mounting damage. This means if you connect this, you will be stick on the monster’s back.
This attack does not provide super damage, but this makes MHW Sword & Shield one of the best weapons for mounting monster on-the-fly. As other weapons technically don’t have a jump attack (minus the Insect Glaive of course) and require some terrain setup to mount monsters.
This will also make you an awesome supporter who can help down a monster when needed. Be caution though, mounting attacks do have some sort of “cool-down” period. The more you do it, the longer it takes to perform another mount again. It’s may not be new to veteran hunters, but it’s something worth mention before start spamming.
Try to utilize the first attacks when you start the fight.Just mount right there and move on.
- Circle, on the other hand, will utilize the shield to perform a downward slam. This counts as blunt damage, meaning you can stun the monster if the hit connects to the head.
Yes, this can knockout the monsters if your hit is on points. This attack deals higher damage than the Triangle variant and provide two hits which have some minor area damage. This should be your main charge attacks after you “used up” the Mounting Attacks or while waiting for that to be usable again. This also provides the highest damage for Sword & Shield in short burst – While you are not doing the “Endless combo” (more below)
You can also combine this with the Shield Bash combo. MHW Sword & Shield clearly not the greatest weapon to do stun damage. It does capable of doing it with some more optimization (in armor skills) and practice.

Two paths to follow – choose depending on the situation.
- Block – Pretty straightforward, to use your shield simply press R2. Of course it cannot compare to that badass shield of Lance or Gun Lance, and you can notice that this small shield can only block some small attacks. However, it’s better than nothing 🙂
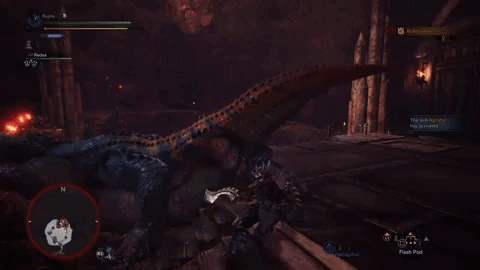
Finally, Sword & Shield is the only weapon in the game where you can use items without sheathing your weapon. This helps reducing some delay during combat which may cause a lot of troubles for new players.
For all the basic attacks and some minor information – Check out this video
Check out the basic hunting guides here: Basic Hunting Tips & Items
But that’s not just the main advantages. While you are not affected by the sheathing animation, using items will be faster. If you are with a team, this can help empower your teammates starting from that health boost to the more advance stuff like buffing or curing.
Finally, with the addition of Slinger – a small weapon using projectiles. For other weapons, if you want to use the slinger, the hunter will go through the sheathing animation similar using consumables. With Sword & Shield , you can fire off that Flash Bug right on time and take down that Rathalos in a blink of an eye.
Who knows, you may save your teammates by this! Or at least, your self when trying to reach that precious Mega-Potion.
Advance Attacks & Tactics

So the special skill of Sword & Shield is the ability to initiate a charged slash and follow up depending on the situation. To use Sword & Shield effectively (in term of combat) is to master the timing of this Charged Slash and how to incorporate it with other attacks.
Charged Slash – Shield Slam or Mounting?
The Charged Slash can be initiated anytime by input ![]()
![]()
![]() (hold) during attacks. You can either start off with a Triangle or after finish the whole combo string.
(hold) during attacks. You can either start off with a Triangle or after finish the whole combo string.
This special moves also serve as the final moves of certain combo, meaning if you follow to the end of these combos, Charged Slash will be initiated:
- Shield Bash Combo >> Charged Slash
![]()
![]()
![]()
![]()
![]()
![]()
![]()
![]()
![]() (hold)
(hold)
- Strong Attack (Lateral Slashes) >> Charged Slash
![]()
![]()
![]()
![]()
![]()
![]()
![]() (hold)
(hold)
Above are the “official” ways to initiate this attacks, but it should not be the main way, as this Charged Slash is better used as a situational tool, where you decided to deal damage or mounting the monsters.
With that said, below are some common setups:
- Basic Attack >> Charged Slash


 (hold)
Quick and dirty 🙂 This is used when you just want a fast charged slash, this can be canceled by rolling
- Advancing Slash >> Charged Slash
![]()
![]()
![]()
![]()
![]()
![]()
![]() (hold)
(hold)
My personal favorite, I used this combo every time I start a hunt when starting the fight. This is to get the first lead (mounting and take down it quickly) Eventually this will get a little spammy if you get used to it.
- Combo String >> Charged Slash >> Shield Slam
![]()
![]()
![]()
![]()
![]()
![]()
![]()
![]()
![]()
![]()
![]()
![]()
![]() (hold)
(hold)
Put the setup aside, we all know the question here is to how to utilize the Charged Slash when it’s connected, as mentioned when you hit the monster with Charge Slash, you can either follow up by ![]() or
or ![]() for the Downward Slash or Shield Slam respectively.
for the Downward Slash or Shield Slam respectively.
The key things to note here is that the Mounting Attacks always coming with the thing call “Resistance overtime” meaning the monster’s resistance to the status ailment will be increased every time that ailment is proc. That applies to mount attacks as well. This is to limit the players spamming one attack or elemental proc.
The only chance which you can guarantee a 100% Mounting is at the beginning of the fight where you first sighting the monster. The mounting chance will reduce from there, it will take longer each time you ride on that lovely back.
So with that out of the way, Downward Slash should be used at the beginning of the fight or after your team mate finish their own riding experience. After that, this depends on the time of the fight, if it’s more than 90 seconds you can try to mount again.
But that’s should not be your main focus, as the Shield Slam provide greater damage and are quick to execute and also capable of dealing KO damage. This should be your main arsenal when using the Charge Slash.
The “Secret” Combo
I miss this in the previous guide, a serious mistake by my side. This is one of the things make Sword & Shield one of the best weapons in games to inflicting status aliment on monsters. This trick is not documented in game, but it’s a must known for every player (and probably everyone already known about this)
- The never-ending combo
![]()
![]()
![]() (during any combo)
(during any combo)
During your attacks, pushing back on the left analog and Triangle, the hunters will perform a back attack, switching the direction with a small swing.
This looks innocent at first, but this is the key to unlocking Sword & Shield potential. If you use any combos normally (Lateral Slash for example) you will notice there is a long windup time after this combo finished before you can try it again.
But if you incorporate this little attacks at the end, you will eliminate this recovery frame immediately – meaning you can do a forever Lateral Slash without any interruption. Just like this:

After the Shield Slam, this combo also become the main damage output for Sword & Shield , with this, you can easily proc that Sleeping effect on the Monsters and putting some Bomb onto their faces 🙂
Or if you prefer some more direct interaction, this also provides the best damage when the monsters are down. Choose your position wisely (Tail and using Lateral Slash to cut or head and sneak in some Shield Bash + Slam combo) and give em a taste of your small sword.
Playstyle & Builds
Sword & Shield is one of the lowest DPS weapons in Monster Hunter: World but is compensated by the speed and the intuitive control.
To use it effectively, the key is to utilize the biggest advantages of this weapon – Using item without sheathing your Sword, this can be utilized to put a trap during fights or quickly using that Demon Powder and gain some advantages. This weapon is also famous for its supportive nature in previous Monster Hunters titles, where you utilize this trait to use certain wide area buff item (Life Powder.. ) and empower the hunter’s group.
In Monster Hunter World, depending on your play style, you can choose the Armor Skill needed to use this versatile weapon to its fullest. If you prefer supporting team-mate, skills that help enhance items usage is a good choice:
- Wide Range – Allows the effects of certain items to also affect nearby allies. One of the must-have skill for support players.
- Speed Eating – Increase the speed of consumable items
- Free Meal – Gives you a predetermined chance of consuming a food or drink item for free. 25% – Trust me, this happens more than you think
- Item Prolonger – Extends the duration of some item effects.
- Recovery Up – Increases the amount restored when restoring Health.
- Mushroomancer – Let you digest (using directly) different kind of mushroom. Below is the benefit of each types
Blue Mushroom – Same effect as potion, restore your HP by a small amount.
Toadstool – Increases HP Recovery (5 mins)
Nitroshroom – Increase attack power.
Parashroom – Boost your Defense.
Mandragora – Restore and maximize your HP & Stamina (Just like Max Potion, Wide Range skill has no effect on this item)
Devil’s Blight – Increase Stamina recovery and halves the stamina cost for all actions.
Exciteshroom – Give out random effects.
With that said, it does not mean Sword & Shield doesn’t have damage, with proper timing and usage for Charged Slash and The endless combo you can take out even the most formidable monsters. Utilize the speed of this weapon, Elemental Damage or Ailment status attacks is a superb addition to this arsenal.
If you prefer the damage, the following skills should be your main focus
- Attack Boosts – Pretty straightforward, increase your attack damage by an amount, however, try to aim for the “sweet spot” level 4 Attack Boosts will increase your affinity as well (Monster Hunter critical chance)
- Critical Eye – Increase Affinity directly (3% each level until level 4, after that it will be 5%)
- Agitator – Increase attack power when monsters become enraged – I never see any calm monsters when being poked in the ass. This will give you attack power (Start at 4 and increase by 4 per level) and affinity rate (starting from 3% and increase by 3% per level) This skill can be obtained from the infamous discs cover monsters – Nergigante or the Challenger Charm.
Below skills are set bonuses (armor skill that activates when you wearing a set)
- Critical Element – From Rathalos set, this skill increase elemental damage when landing critical hits which in turn boost your overall elemental build, with the fast attacks Sword & Shield is one of the choices for any elemental build. The downside is you will need more tuning to armors choices as it requires two pieces of Rathalos set to activate.
“Lion Tyrant” – Fearless Warrior
This is my personal build which took in turn many frustrations I had when playing Monster Hunter for the first time. Let’s take a look at the appearance of this build first 🙂

Yup, It’s how the build looks like
Right from the bat, it’s a mix set between Bazegeuse and Nergigante Armor. These high-rank monsters may not be an easy foe if you are not used to Monster Hunters. We will walk out way back starting from HR 1 to ~HR 35 (Where I obtained the full set first time)
Don’t worry, you will know what to do by the end of this post! If you want to skip straight to the build, be my guest, the below is for some more starters who want details on the steps to build their first high-rank set and may serve as a frame for other weapons.
Walking your way to High-Rank
In Monster Hunter World. The journey from HR 1 to HR 16 can be done via the main story pretty easily. For Sword & Shield, after mastering the above skills, you may want to choose some basic weapons to get the job done.
If you want a quick run-down on Monster Hunter World basic – check out my post here: Monster Hunter: World – Hunting 101
One of the easiest weapons to get early is the Jagras Weapons tree – the infamous lizard monsters that were weak to almost every elemental & statuses.

When you first joining the High Rank – your main goal should be getting the essentials items to make the hunter stronger. One of the first thing the game won’t tell (or very ambiguous) is the Power/ Armor Charm items.
These little items can be purchased in the Tradeyard shop. You can also upgrade these two items with Bazelgeuse part – which mean this flying-dropping-bombs monster should be your first priority target for HR.

Bazelguese – the first HR monster you need to spend some time hunting
After this bomb dropping guys, your next target should be Nergigante. This monster provides some way of testing your skill during High Rank, and provide the materials/ parts needed for some highest DPS weapons in game.
Of course, this Elder Dragon eating monsters is not easy, you should have some experience with other aggressive monsters like Rathalos or Azure Rathalos before starting on a long hunt with Nergigante.

Actually, Rathalos is a pretty decent foe which balances both the challenge and loot drops. Rathalos set will also help you sustain the journey toward Nergigante fight.

Rathalos Armor Set is pretty balance in term of skills and stat. This can help you a great deal before building your optimal set.
Your optimal stat to face the Nergigante should be around 320 Attack (For Sword & Shield – can including meal boosts and other items) This Attacks stat is enough to fight this guy, but knowing his moveset is also a priority. After master the Nergigante – Congrats you have set the first step to build armor.
You can checkout my SnS Witcher Build.
With everything setup out of the way, let’s see what parts make up this build:
Armor Set
For Bazelgeuse, I picked the helm, gloves & waist armor:

-

- Two points to Earplug and one levl 3 slot

-
- Guts – Sustain an attack that normally cart you.

-
- Nullify all monsters roar
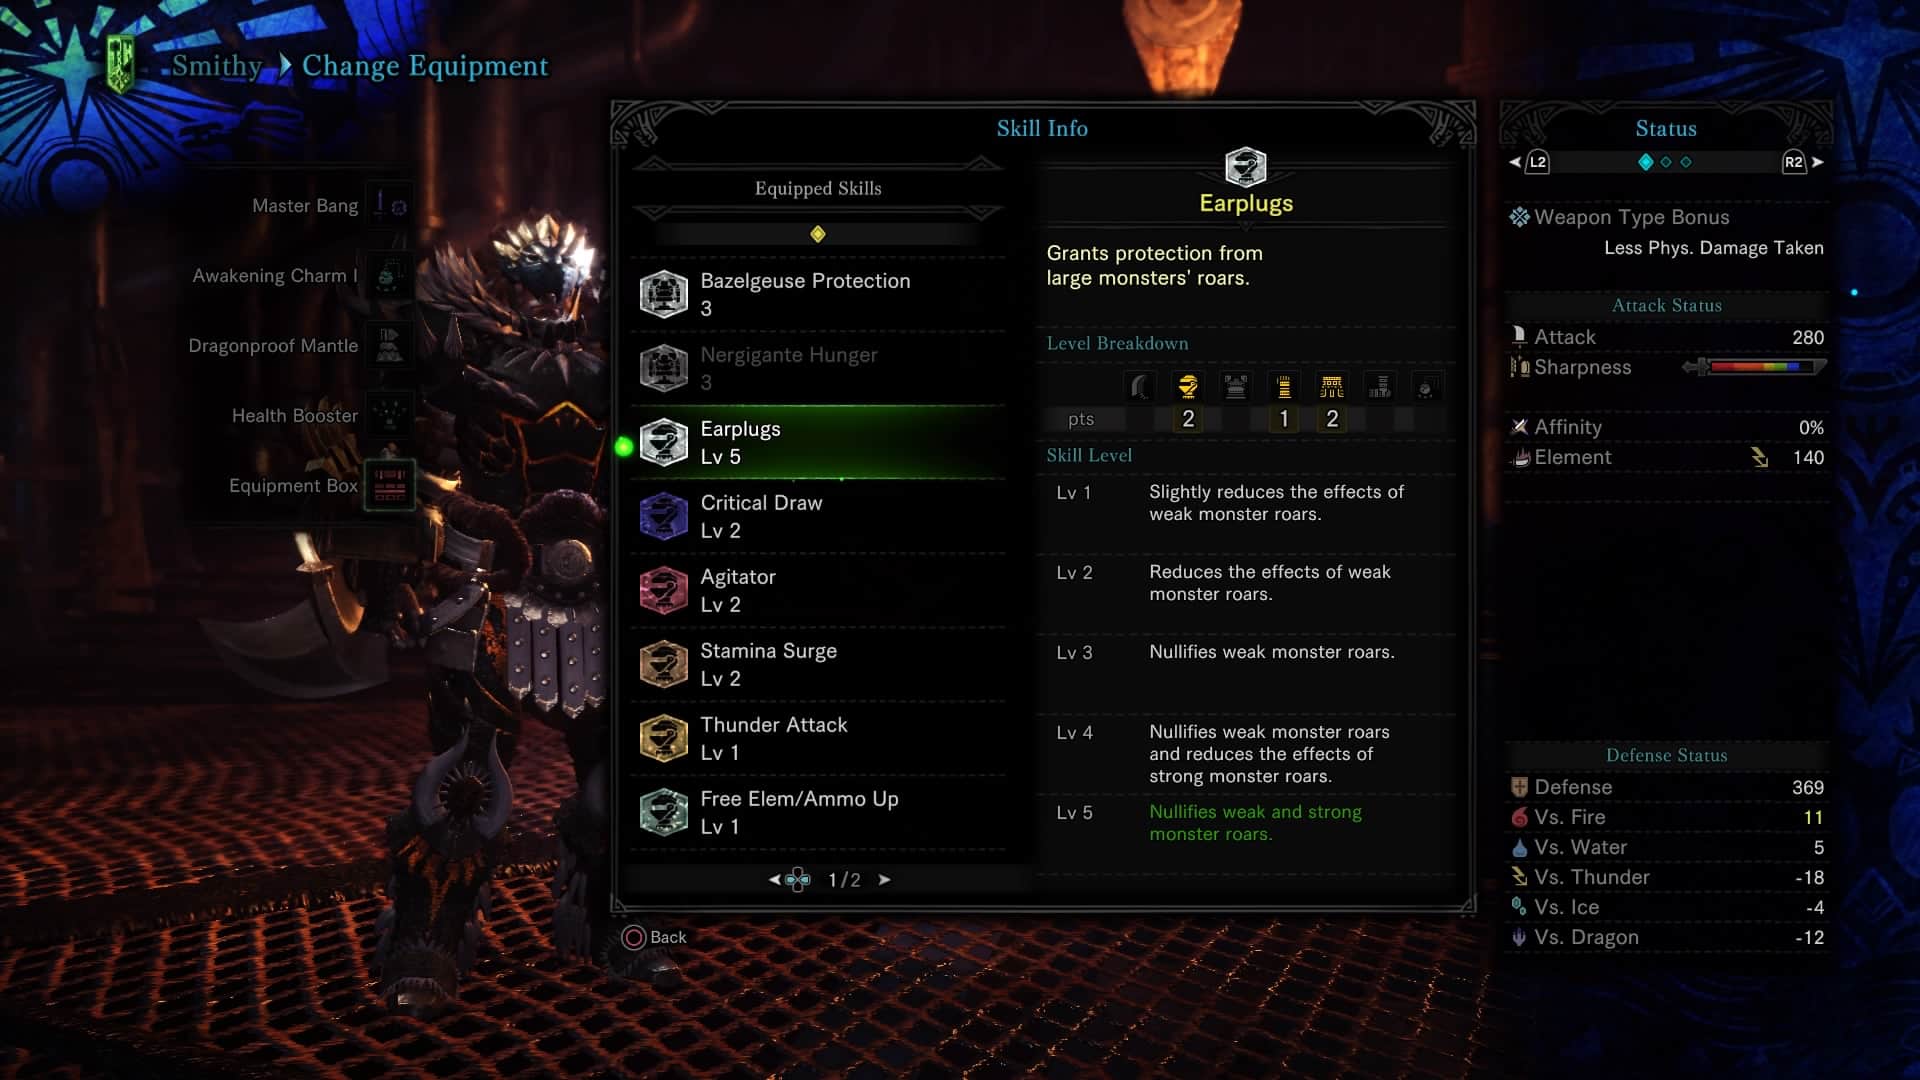
And for this skill only:
- Ear Plug – Yes, simple as it sounds, but it helps empower any builds in a very special way. At first, the monsters roar seem pretty interesting to a new player (like me) But overtime it will become your main frustration. This skill nullifies all the roar effects. No longer interrupting during the combo. The downside is it needs 5 level to achieve this state. To compensate this, Bazelguse helm has one slot for a level 2 gem. Depend on your liking, this will boosts your build in many ways.
For Nergigante – The armor set is pretty straightforward to increase your damage.

+1 Agiator +2 Stamina Surge

+1 Agigator +1 Maximum Might
- Agitator – Increase damage when the monster is angry. This literally mean increase more damage. There is no monster that never angry during the entire journey.
- Maximum Might – Increase Affinity while Stamina is full, with level 1 you will have 10% Affinity
- Stamina Surge – Speeds up stamina recovery, at level 2 this will be 20% supporting the above skill
Charm & Gems
For Charm it’s more on the situational side. If you prefer a more aggressive approach, any charms that enhance the attack skills mentioned above is fine.
For Gems, as the level 5 Earplug take up most of out armor slot. You will need Attack Boosts/Weakness Exploit to boost the DPS of the build. While it’s not easy to get these gems right away, try sneaking some utility gem like Free Meal/ Defense/ Friendship/ Slugger. This will boost your utilities for supporting or attacking the monsters.
Weapon(s)
For this build, I personally used the Master Bang. This weapon is the first High-Rank weapon that you can obtain pretty quick after finish the story. The weapons tree starting from Steel Knife – a basic weapon that you can get very early in game. Go through the main story, you will easily obtain the High Commendation – an item to craft special weapons & armors and also one of the materials for the Master Bang. Finally, you will need Wyvern gem, an item obtained from Wyvern types monster, if you spend some time at Coral Highland hunting for Legiana, there are very high chances you already had this material.


Master Bang base attack (physical) is 280 which is pretty one of the highest DPS weapon in Sword & Shield tree (after the Devil Jo & Nergigante Sword & Shield ) You will also notice there is a stat showing 330 as Lighting Damage. This is “Free Element” meaning you will need the armor skill Free Elem/Ammo up to unlock this affix. Strange as it seems, but 330 is also pretty High for Lighting Damage (after the Kirin weapon)
However, this stat only gets its full effect with 3 level of the Free Element/ Ammo Up skill – which took quite some setup to get it to the fullest. So it’s more of an “extra” when you want to tackle those Lighting weakness monsters (Most of the Dragons in MHW is weak to lighting)
With that said, you can choose other weapons that have more DPS or Elemental to suit your next hunt. Some suggestions:
- Eradication Vanguard – 294 Attack and 150 Dragon – Provide exceptional damage and best for hunting dragon. If you are lucky, you may already have the Nergigante gem while farming for the Chest and Leg armor in this build.
- Fatal Bite – 308 Attack and 210 Dragon – The stat says it all, however, Deviljo is not an easy foe to overcome, prepare carefully before hunting this cucumber
- Other Elemental Weapons – Gnashing Flammesucher (Anjanath) or any other weapons that support high elemental damage is pretty viable for this build, just remember to change the charm & gems so it can suite your play-styles.


MHW Meta Builds 2019 – Sword and Shield
Thanks to the tireless MHW community, we now have a compilation list of the most universal agree meta builds for each weapon. You can check out the awesome metabuilds for all weapons on Reddit here.
For Sword and Shield, check out some of the common meta builds as below:
Sword and Shield Meta Builds – Best Damage
This is currently the best set for damage of MHW Sword and Shield, and yes, it is Drachen again, with a slight changes with Gamma Nergigante Coil.
Weapon – Fatal Bite (Deviljho)
Armor – Full Drachen Set (Critical Boosts + Affinity + Power Prolonger + Master Touch) Gamma Nergigante Coil (For Maximum Might)
Charm – Handicraft Charm III
Jewels
- Tenderizer (Weakness Exploit) x 3.
- Challenger (Agitator) x 1
- Expert (Critical Eye) x 1.
- Mighty Jewel 2 (Maximum Might) x2
- Attack (Attack Boosts) x 1.

Sword and Shield Blast Builds
As Sword and Shield is one of the fastest weapon in Monster Hunter: World, you can now build up Blast a hell lot faster thanks to this. As Blast is not considered as Elemental Damage, you don’t need Critical Element.
To compensate for the loss of Raw Damage, Peak Performance is added to the mix by the Unscathed Charm, and to keep this build viable, Health augment is used on the weapon as well. Agitator is also got pushed to max. If you don’t have Challenger Jewel, you can slot in additional Attack Jewels (You now have 3 Attack Jewels during a normal playthrough, the rest is depend on your luck) or put in some Vitality boosts.
The downside of this build is you need to farm that frustrating Lunastra and get to HR 100…
Weapon – Empress Edge ‘Ruin’ (Lunastra)
Armor – Full Drachen Set (Critical Boosts + Affinity + Power Prolonger + Master Touch) Gamma Nergigante Coil (For Maximum Might)
Charm – Unscathed Charm II
Jewels
- Tenderizer (Weakness Exploit) x 3.
- Challenger (Agitator) x 2
- Expert (Critical Eye) x 1.
- Mighty Jewel 2 (Maximum Might) x 1
- Attack (Attack Boosts) x 2
- Flawless (Peak Performance) x 1

Please note that these builds are picked base on the highest value of Raw Damage value. The tool used in this picture is the awesome Honey Hunter World MHW Builder
Sword and Shield Element Builds
Previously before Arch Tempered Kulve Taroth, If you want to have a viable elemental builds, Critical Element is a must, and the only way to get this while still getting some other essential armor skill is to mix up Rathalos Beta (Weakness Exploit x 2) and Azure Starlord Alpha (Handicraft x 1) This will then enable the Critical Element.
After this, you will lose Master Touch (Bonus for wearing 4 of the Drachen set) To make up for this, Kaiser Gamma set is used (Arch-Tempered Teostra) to get this armor skill back.
The last piece of the puzzle is the weapon and jewels. Taroth Slicer ‘[Insert Elemental here]’ will normally used, and you will need the Free Element charm to unlock the element. Finally, to properly finished the build, you will need to add in Critical jewels and Tenderizer as needed.
An example of this style of build is as below:

This is a very costly builds to just add in some elemental to your
But after Arch Tempered Kulve Taroth and the introduction of the Kjarr weapon, you are now safe with just the weapon equipped, as each of the Kjarr weapon comes with an innate Critical Element. And yes, we again come back to the Drachen set.
As this build focus entirely on each specific element, you can now add in Element Jewel to power up the weapon and maximize Affinity Rate

You can check out other Sword And Shield meta builds here.
A shoutout to Honey Hunter World for creating the awesome MHW Builder (Screenshot above are from the tool)
Conclusion
That’s cover the basic and advance detail for MHW Sword & Shield, and what you can do with this awesome weapon. This does need your input to make sure I cover everything, feel free to comment and let me know your thought on this article.
After some Odogaron hunts in the last collaboration event, I did get my hand on the Odogaron gem. This allows me to craft a very special weapon!
Check out my Monster Hunter World Weapons Guides here:
Ranged Weapons Guide:
- Monster Hunter World – Light Bowgun Guide
- Monster Hunter World – Heavy Bowgun Guide
- Monster Hunter World – Bow Guide
Melee Weapons Guide
- Monster Hunter World – Switch Axe Guide
- Monster Hunter World – Charge Blade Guide
- Monster Hunter World – Gun Lance Guide
- Monster Hunter World – Insect Glaive Guide
![MHW Builds | Hammer Build Guide [Pre Fatalis]](https://cdn1.ethugamer.com/wp-content/uploads/2020/10/04080054/image-11.png)
![MHW Iceborne SnS Build [Pre Fatalis]](https://cdn1.ethugamer.com/wp-content/uploads/2020/10/04075752/image-5.png)

[…] previous post of Sword & Shield – MHW Sword & Shield Guide I mentioned the Jagras weapons tree. This time, for Charge Blade, the focus is a little […]